azure.microsoft.com
Cloud can be tricky sometimes. Find out what scenarios we've ran into that are worth being mentioned and explained.
Introduction:
Azure Bastion is a managed platform service that provides secure and seamless Remote Desktop Protocol (RDP) and Secure Shell (SSH) access to virtual machines (VMs) directly through the Azure portal. By eliminating the need for public IP addresses and reducing exposure to threats, Azure Bastion ensures a secure remote connection to your Azure VMs. This step-by-step guide will walk you through the process of configuring Azure Bastion for enhanced remote access.
Prerequisites:
Virtual Network: Have a virtual network in place where your VMs are deployed.
Step 1: Access the Azure Portal
Log in to the Azure portal using your Azure account credentials.
Step 2: Navigate to the Virtual Machine
In the left-hand navigation pane, select "Virtual machines"
Choose the specific VM for which you want to configure Azure Bastion.
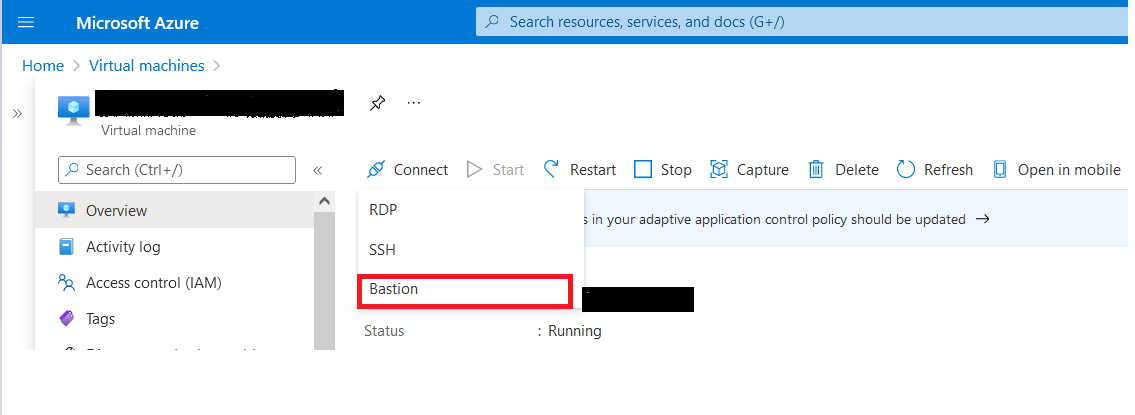
Step 3: Enable Azure Bastion
Within the VM's details page, click on the "Bastion" option in the left-hand menu.
Click on the "Enable Azure Bastion" button.
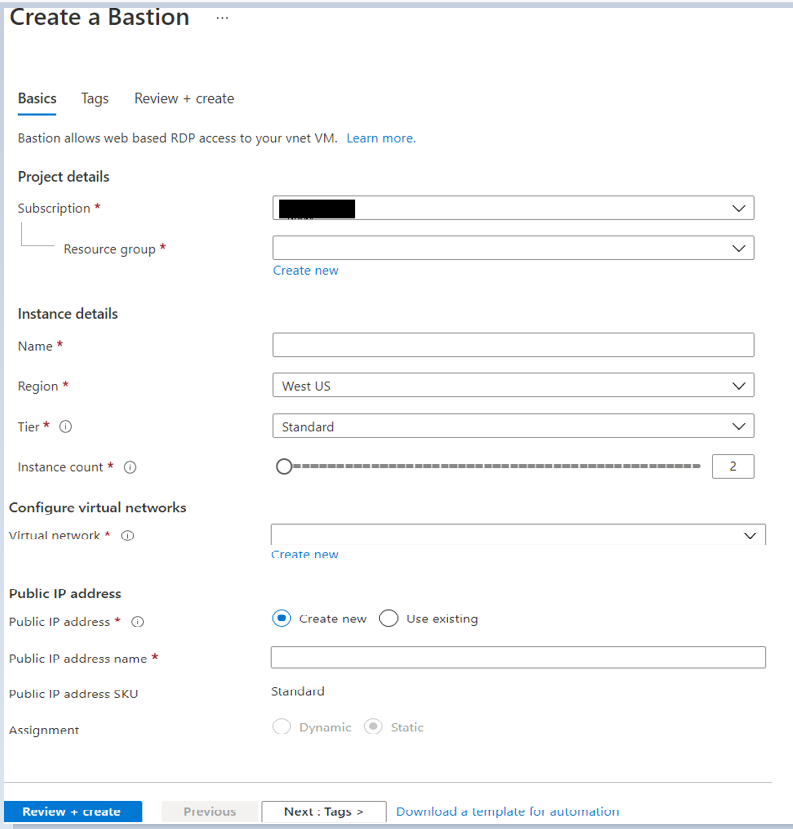
Step 4: Configure Bastion Settings
• In the Azure Bastion configuration page, provide a name for the Azure Bastion resource.
• Choose the virtual network to which you want to add Azure Bastion.
• Configure the subnet settings. Ensure that the subnet you choose is different from the VM subnet.
• Subnet Name: Use the specific name "AzureBastionSubnet" for the subnet dedicated to Azure Bastion.
• Subnet Address range: Define an appropriate address range for the "AzureBastionSubnet." It is recommended to use a separate address range from your VM subnet.
• Set the public IP address settings, either choosing an existing IP or creating a new one.
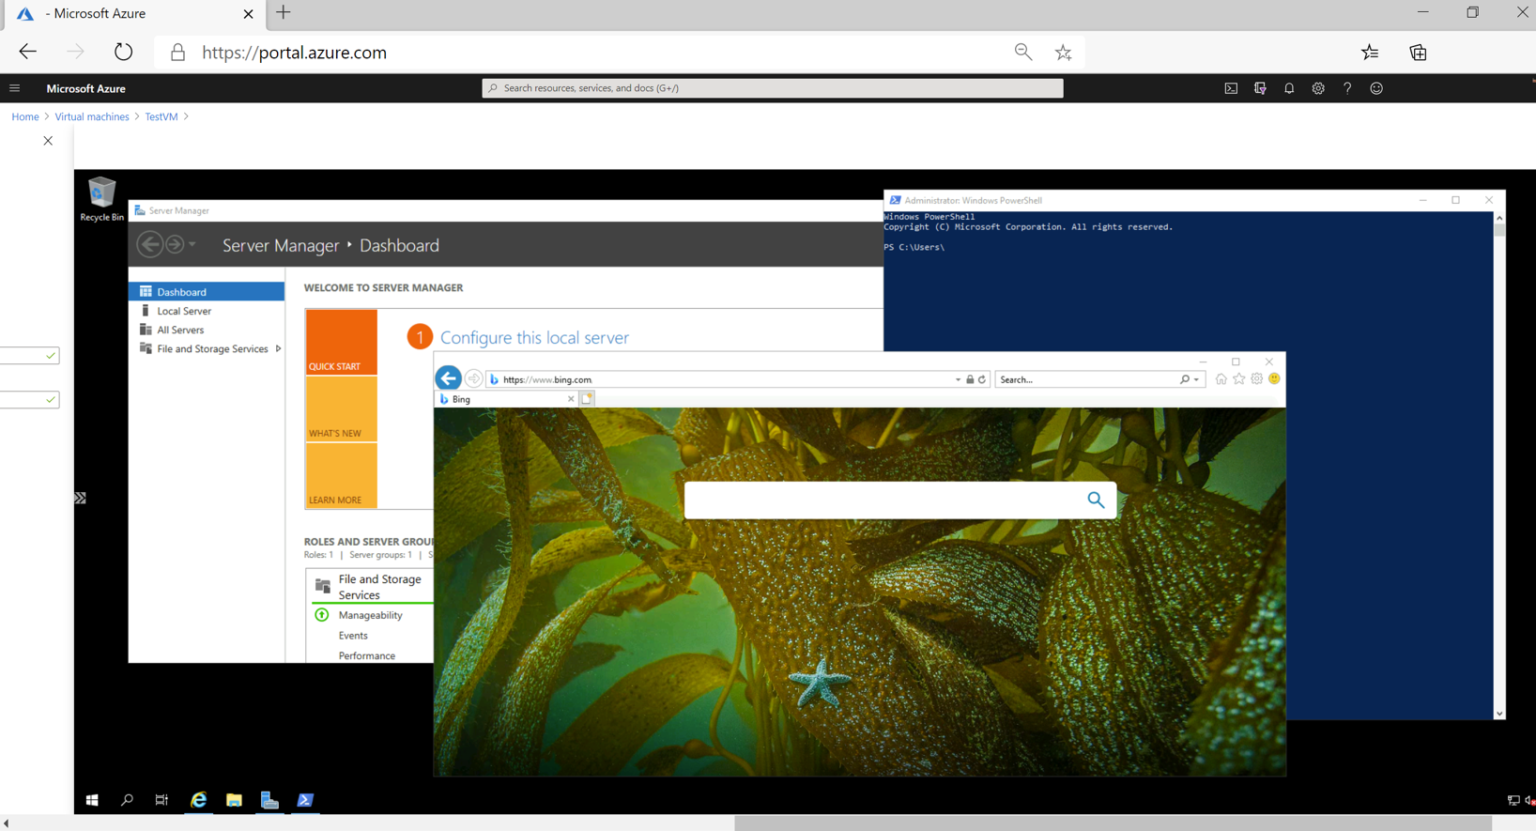
Enter the username and password for the VM.
Click on "Connect"
Here you can see RDP connection for this VM will open in a new tab via Bastion that allow you to perform all the actions.

Transform your business.
Run adaptive.
Phone: +40 73 523 0005
Email: hello@adaptive.run