Cloud can be tricky sometimes. Find out what scenarios we've ran into that are worth being mentioned and explained.
Introduction
Azure App Service is a fully managed platform that allows developers to build, deploy, and scale web apps. Scaling is a critical aspect of managing applications efficiently, and Azure App Service provides various scaling options to meet diverse workload requirements. In this article, we will delve into the scaling capabilities offered by Azure App Service and provide a step-by-step example of configuring an autoscale rule using the Azure Portal.
Understanding Azure App Service Scaling:
Azure App Service offers both manual and automatic scaling options to accommodate different application needs. Scaling can be achieved either vertically (scale up/down) or horizontally (scale out/in).
1. Vertical Scaling (Scale Up/Down):
• Scale Up: Increase the resources (CPU, memory) of an existing App Service plan.
• Scale Down: Decrease the resources of an existing App Service plan.
2. Horizontal Scaling (Scale Out/In):
• Scale Out: Increase the number of instances (nodes) running your application to distribute the load.
• Scale In: Decrease the number of instances to optimize resource utilization.
Autoscale in Azure App Service:
Autoscale is an automatic scaling feature that allows App Service to dynamically adjust the number of instances based on specified rules and metrics. This ensures optimal performance and resource utilization.
Configuring Autoscale Rule in Azure Portal:
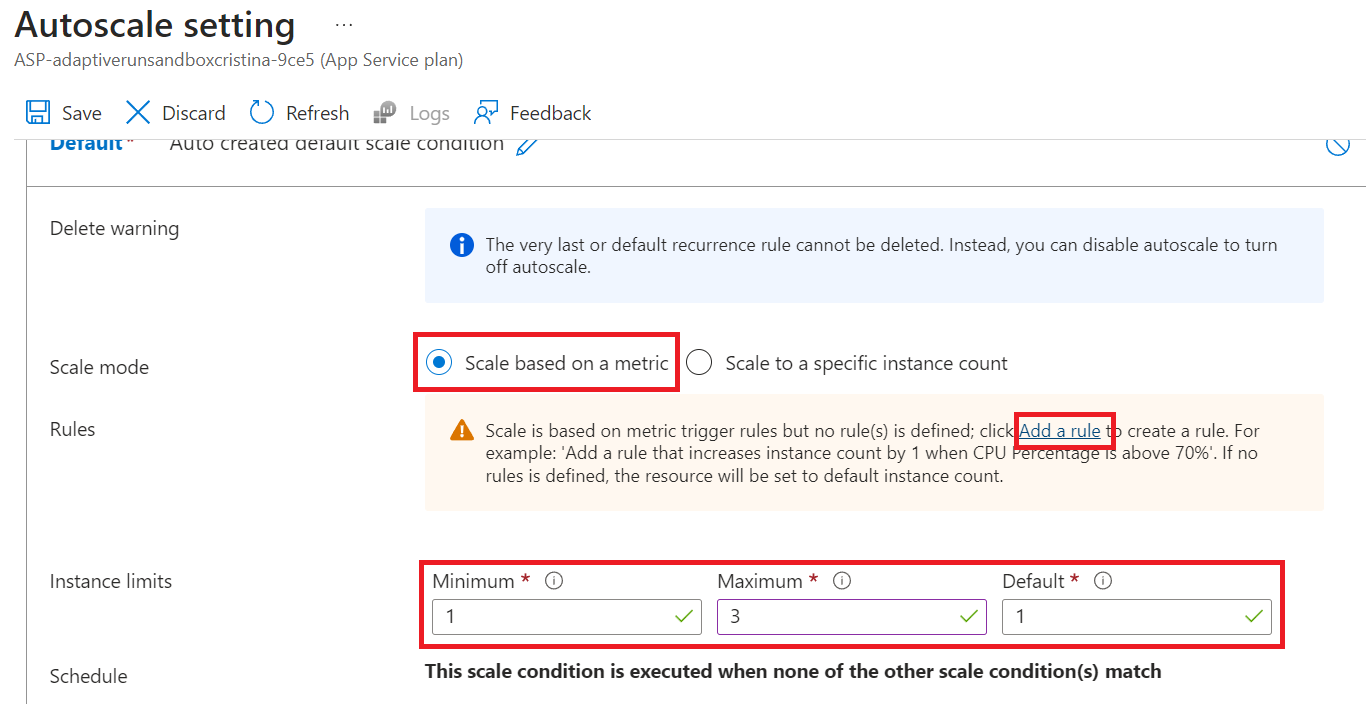
Let's walk through an example of configuring an autoscale rule in the Azure Portal. For this scenario, we'll create a rule to scale between 1 and 3 instances based on memory usage.
1. Navigate to Azure Portal and log in to your account.
2. Select your App Service: Choose the App Service you want to configure.
3. Autoscale Configuration: In the left navigation pane, select "Scale out" under the Settings section.
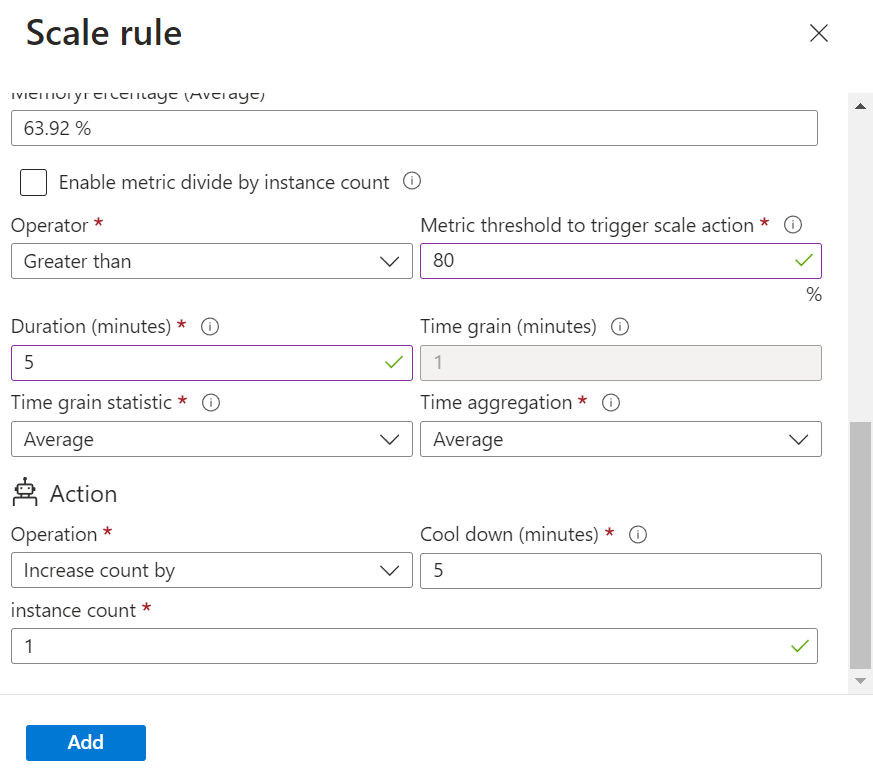
• Scale In (Decrease with a Node): Scale in when memory percentage goes below 20% in the
last 5 minutes.

Transform your business.
Run adaptive.
Phone: +40 73 523 0005
Email: hello@adaptive.run